Dungeon Quest Reborn
The authoritative guide for Dungeon Quest Reborn Roblox and classic Dungeon Quest Roblox players. 9 dungeon routes, verified 4-phase boss systems, spell scaling, weapon archetypes, classes, and verified live codes — built strictly from authentic sources.

Roblox Dungeon Quest Reborn Codes (Early Access)
Currently, there are 0 active codes in Dungeon Quest Reborn. Beware of external generator tools, scam sites, or phishing links asking for your account login — all legitimate codes are redeemed strictly inside the in-game settings menu.
Telemetry recorded directly from the official Roblox games API on 2026-10-10. Live figures fluctuate constantly.
Classes & 4 Core Archetype Builds
Warrior
Physical Power FocusHigh burst close-quarters damage. Relies strictly on telegraph kiting since Warriors have no native self-heals in combat.
Mage
Spell Power FocusRanged kiting and persistent AoE wave clear. Scales active spells like Starfall, Amethyst Blast and Inner Focus.
Guardian
Survivability / TankAbsorbs arena pressure and baits boss telegraphs away from glass-cannon teammates. Essential for Hardcore runs.
Dual-Stat Trap
⚠️ Common MistakeDamage formulas scale non-linearly. Splitting points cuts your effective damage multiplier by over 50%. Always commit to one axis.
The 9-Tier Dungeon Progression Ladder
Desert Temple
Sandstone ruins and open arenas — the place to learn the boss loop.
Winter Outpost
Frozen fortifications with colder, more punishing floors.
Pirate Island
Ship decks and coves — multi-room boss flow.
King's Castle
Royal halls — tighter arenas, more adds.
Underworld
Demonic depths — sustained, high-scaling fights.
Samurai Palace
Eastern-themed fortress — precise, fast patterns.
Ghastly Harbor
Foggy docks — an unlock-gated late route.
Enchanted Forest
Overgrown endgame zone — the top farming route.
Northern Lands
Frozen Norse peaks, runic Viking shrines, and mythic trials.
8 Weapon Archetypes & Scaling
The 4-Phase Loop That Clears Every Boss
Dungeon Quest Reborn bosses share a readable, learnable pattern. Instead of memorizing fixed attack lists, learn the loop below and apply it to any encounter — then confirm the specifics in-game.
Watch the ground shape, animation, or target marker → stop long casts and move to open space.
Track latency, direction, and repeating pulses → leave latency margin and take a planned route.
When the ground clears or the boss pauses → swing the camera back and deal safe damage.
At the next pattern or phase change → return to a spot with multiple exits.
Master Progression & Full Dungeon Walkthroughs
Verified with YouTube's oEmbed API. Key tactical takeaways extracted directly from authentic creator captions — zero speculative filler.
Route walkthrough: Desert Temple → Enchanted Forest
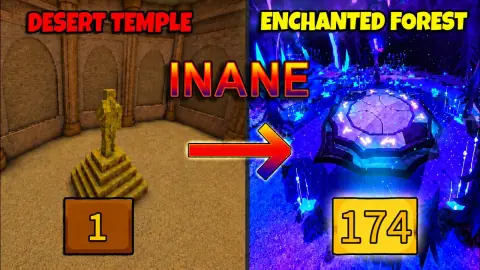
A full-route run that names each boss and the dodge that beats it. Takeaways below are extracted from the video's own captions.
- Desert Temple: only one side of the room is the correct way — glance at the layout before committing, and you can shoot spells through the wall.
- Winter Outpost: the boss cycles three attacks — a spawned minion, straight lines, and green circles. The minion is fast, so keep moving.
- Pirate Island boss is Captain Blackbeard: one big red line that must be dodged, plus red circles.
- Underworld spider boss: it fires six white projectiles — count six, run through, get your damage in, then retreat.
Fastest Progression Route, Daily Reward Scaling & Stance Hotkeys

Comprehensive 1–180 progression breakdown. Tactical takeaways extracted directly from Rexon's verified captions.
- Daily Reward Tier Scaling: Daily login rewards dynamically scale to your character's highest unlocked dungeon tier; claiming daily loot immediately upon unlocking a new dungeon bracket yields gear before beating the dungeon.
- Combat Stance Swap (F Key): Pressing F in combat instantly swaps between your primary DPS ability set and a secondary Healing skill set (e.g., Redemption, Rejuvenating Spray, Aura of Life) without resetting background cooldowns.
- Level 130–140 Boss Raids Corridor: Steampunk Sewers XP progression slows at level 130; farming Tier 1 Boss Raids (which award the same flat XP as higher tier keys) provides the fastest route to level 140 to unlock Orbital Outpost.
- Key Ability Milestones: Fire Bomb (Winter Outpost, premier early mage AoE), Illusion Blast (Samurai Palace Nightmare, first true movement ability), and Pulse Waves / Life Dash (Steampunk Sewers mobility/burst).
Odin Reincarnation Bonus Boss & Northern Lands Endgame

Verified endgame clear and live preview of the Odin Reincarnation bonus boss mechanic. Key takeaways extracted from Rexon's authentic English captions.
- Northern Lands Nightmare Level Gate: Recommended character level is 187–190+ with optimized high-tier gear before attempting solo clears.
- Bonus Boss Activation: Upon defeating Odin at the end of Northern Lands Nightmare, a voting prompt ('Stay and fight the bonus boss') appears; selecting fight activates the bonus encounter.
- Strict Encounter Rules: The Reincarnation boss stage imposes a 5-minute time limit and a hard 3-lives cap — deaths cannot be bypassed with infinite revives.
- Platform Positioning Strategy: Kiting the boss and standing back on the upper elevation platform allows dodging low-trajectory nuclear projectile barrages.
100+ Hours Full Class Progression & Endgame Unlock Secrets

Complete progression from Level 1 to Level 130+ endgame raid readiness. Extracted from verified English captions.
- Endgame Unlock: Level 100 unlocks the high-tier lobby hub with advanced vendors; Level 130 unlocks the 8-player Boss Raids.
- Class Progression Playstyle: Mage offers superior early-to-midgame solo clear speed due to ranged kiting, whereas Warrior scales dramatically once high-tier armor and EIR (Enhanced Inner Rage) are acquired.
- Economy Discipline: Do not over-upgrade early dungeon drops at the Blacksmith. Only spend 100-200 gold per item until reaching Tier 3 epic drops to avoid gold starvation.
- Wave Management: Mob packs in high-difficulty Nightmare will stagger-stun you if grouped carelessly; always bait perimeter mobs before engaging dungeon guardians.
Solo Mage 70/30 Stat Split & Steampunk Nightmare Clear

Extracted from verified English captions. Explains why full glass cannon fails in post-level 100 solo content and demonstrates survivability stat scaling.
- Stop Playing Pure Glass Cannon: Putting 100% of points into Spell Power caps HP at roughly 700k, leading to instant deaths from minor mob desyncs or hitbox clips.
- The 70/30 Survivability Ratio: Shifting roughly 30% of your stat allocation into Stamina surges health to 2 Million HP while damage barely dips (from 23B to ~21B) — a massive 3x survivability boost for negligible DPS loss.
- Starfall Mastery: Ranks Starfall as superior to Smite due to reliable targeting, consistent AoE tick damage, and safe standoff distance.
- Heal Dash Synergy: Combining Life/Heal Dash with 2M HP provides sufficient health buffer to survive stray boss hits while repositioning.
Early-to-Midgame Progression Bible & Stance Swapping

Extracted from verified English captions. Details early dungeon skill progression from Desert Temple through Pirate Island, plus F-key stance swapping.
- Early Spell Milestones: Poison Cloud (Desert Temple) provides top damage-over-time; Lightning Strike offers instant burst; Ice Needles (Level 32) provides rapid low-cooldown cycling.
- The Winter Outpost Solo Wall: Winter Outpost (Level 40-60) is the steepest solo difficulty spike in the game; players should expect to overlevel to 55-60 before reliably clearing it solo.
- Keyboard 'F' Skill Swapping: Reborn enables mid-combat skill set swapping by pressing F, allowing players to instantly toggle from DPS abilities to dedicated healing loadouts.
- Aura of Life Nightmare Tanking: Equipping Aura of Life with full spell power instantly restores 100% of player and teammate HP on a short cooldown, allowing teams to out-heal Nightmare boss attacks without dodging.
Gamepasses Value Analysis, Daily Scaling & F2P Viability

Extracted from verified English captions. Breaks down why gamepasses are convenience perks rather than pay-to-win gates, along with daily reward scaling and gold economy discipline.
- F2P Progression Balance: Gamepasses provide convenience and scale with character tier, but the game is completely beatable free-to-play through boss grinding and player trade hand-me-downs.
- Mage-to-Warrior Progression Curve: Highly recommends leveling as Mage from Level 1 to 100 due to superior early AoE range and kiting; Warrior physical skill variety only opens up past Level 100.
- Chain Heal vs. Universal Heal: Chain Heal features a rapid 6-second cooldown, making it far superior for solo dungeon survival compared to Universal Heal's lengthy 12-second downtime.
- Upgrade Cost Traps: Endgame items require over 4,200 upgrades at the Blacksmith (costing billions of gold); avoid over-upgrading transitional mid-tier items to preserve gold for endgame gear.
Complete Wiki & Systems Index
Wiki & Database Index
Master reference index for all 9 dungeons, weapons, abilities, spells, loot roll logic, and verified community links.
Open Guide →Dungeon Routes (9 Tiers)
The complete 9-dungeon tier progression path with encounter telegraph mechanics, solo routines, and group strats.
Open Guide →Boss Encounter System
How to fight any DQR boss: the Warning → Travel → Recovery → Reset loop, safe damage windows, and learning patterns cleanly.
Open Guide →Abilities & Keybinds
Active combat skills directory: Life Dash, Starfall, and how enhanced ability buffs amplify team DPS by 80–90%.
Open Guide →Spells & Spell Power
How spells drop, why they scale exclusively off Spell Power, and honest telemetry on named legendary spellbooks.
Open Guide →Working Codes Tracker
Verified codes tracker with direct status checks to protect players from fake third-party code generator scams.
Open Guide →Loot Families & Req Lvl
The 3 loot families (Weapons, Armor, Spells), four stat rolls per drop, and how the Req Lvl gate dictates equipment usability.
Open Guide →Weapons Library (8 Archetypes)
All eight weapon archetypes — Sceptre, Sword, Bow, Great Sword, Dagger, Scythe, Axe, War Hammer — and their scaling ranks.
Open Guide →Classes & Builds
Warrior vs Mage stat priority, weapon pairings, and how single-stat purity maximizes your clear speed in Nightmare.
Open Guide →Gear Evaluation Framework
Why there is no universal tier list in Early Access — and the objective checklist to evaluate any item drop against your build.
Open Guide →