Boss Encounters & Combat Mechanics
Comprehensive combat directory for all 45 Dungeon Quest Reborn encounters. Verified telegraph dodge patterns, level requirements, solo kiting tricks, and Level 130+ 8-player raid mechanics.
Pattern Recognition Beats Raw Numbers
Because Dungeon Quest Reborn is in active Early Access, boss health values, timers, and scaling multipliers receive frequent developer tuning. Every encounter in the game is designed around readable ground telegraphs (red lines, expanding rings, target markers). Master the universal movement loop below to conquer any tier.
Notable Boss Mechanics & Survival Tactics
The sandstone arena has generous sightlines. Only one side of the corridor is the real route. Spells can shoot through thin ruin walls to safely damage before entering melee range.
Cycles predictably: (1) spawned minion rush, (2) linear freezing beam, (3) expanding green AoE circle. The minion moves fast — keep circling the perimeter and never stand still.
Has a wide linear charge telegraph. When the red rectangular path lights up, dodge sideways immediately. Save dash cooldowns specifically for red circle bomb spreads.
Crucial party rule: If any player is outside the boss chamber gate when the encounter begins, the entire arena floor floods with lethal lava. Ensure all 4 teammates enter together.
Azrallik spawns an auxiliary demon heart and is 100% immune to all damage until the heart is shattered. In the mini-boss room, count exactly 6 white spider projectiles before dashing in to burst.
In the preceding stage, players must intentionally bait boss energy bolts into outer towers to shatter shields. Against Odin, maintain constant diagonal movement to avoid frost cleaves.
Triggered by voting to fight the bonus boss upon clearing Northern Lands. Features a strict 5-minute timer and 3-lives limit. Kiting back to the upper platform allows dodging ground-level nuclear projectile barrages.
The thrown water sphere applies heavy Anti-Heal. Do not stand in its landing trajectory. The exact center of the arena serves as a safe pocket against square area attacks.
Unlocks at Level 130. Features an 8-player rotation of mechanical and elemental titans. Requires assigned tank baiting so high-damage AoE patterns do not wipe glass-cannon Mage stacks.
Dungeon Boss Guides & Tactics (9 Progression Tiers)
Desert Temple
Entry-level encounters featuring Sand Golems and the Sand Giant. Teaches foundational red-box dodge timing and ranged kiting.
Winter Outpost
Challenging frost mechanics, slowing debuffs, and multi-pattern Ice Elemental phases.
Pirate Island
Cannon barrage circles, bomb clusters, and fast melee swarms on seaside piers.
King's Castle
Throne room battle with lethal perimeter lava flood if party members fail to enter the chamber simultaneously.
The Underworld
Immunity shield phases requiring demon heart destruction, spider burst projectiles, and magma hazards.
Samurai Palace
Rapid blade cleaves, high-speed dash telegraphs, and coordinated team positioning requirements.
Ghastly Harbor
Spectral apparition waves, phantom broadside cannons, and heavy spirit-damage kiting routes.
Enchanted Forest
Nature-attuned root traps, venom fog bursts, and high-frequency spellcaster adds.
Northern Lands
Endgame trial requiring pylon shield redirection, blizzard freeze rings, and pinpoint diagonal evasion.
All 45 Verified Boss Encounters
Complete index of all confirmed boss encounters tracked in Dungeon Quest Reborn, divided into Mainline Dungeon Final Bosses, Mid-Dungeon Mini-Bosses, and Level 130+ 8-Player Raid Challenges.
Mainline Dungeon Final Bosses (14)
Final boss of Desert Temple (recommended level 27+). Verify attack patterns and loot on the community wiki.
Final boss of Winter Outpost (recommended level 55+). Verify attack patterns and loot on the community wiki.
Final boss of Pirate Island (recommended level 65+). Verify attack patterns and loot on the community wiki.
Final boss of King's Castle (recommended level 75+). Verify attack patterns and loot on the community wiki.
Final boss of The Underworld (recommended level 85+). Verify attack patterns and loot on the community wiki.
Final boss of Samurai Palace (recommended level 95+). Verify attack patterns and loot on the community wiki.
Final boss of The Canals (recommended level 105+). Verify attack patterns and loot on the community wiki.
Final boss of Ghastly Harbor (recommended level 115+). Verify attack patterns and loot on the community wiki.
Final boss of Steampunk Sewers (recommended level 125+). Verify attack patterns and loot on the community wiki.
Final boss of Orbital Outpost (recommended level 140+). Verify attack patterns and loot on the community wiki.
Final boss of Volcanic Chambers (recommended level 155+). Verify attack patterns and loot on the community wiki.
Final boss of Aquatic Temple (recommended level 165+). Verify attack patterns and loot on the community wiki.
Final boss of Enchanted Forest (recommended level 175+). Verify attack patterns and loot on the community wiki.
Main boss of Northern Lands (recommended level 185+). Verify attack patterns and loot on the community wiki.
Stage Guardians & Mini-Bosses (25)
Mini-boss encountered in Pirate Island (level 60+). Verify attack patterns and loot on the community wiki.
Mini-boss encountered in Pirate Island (level 60+). Verify attack patterns and loot on the community wiki.
Mini-boss encountered in King's Castle (level 70+). Verify attack patterns and loot on the community wiki.
Mini-boss encountered in King's Castle (level 70+). Verify attack patterns and loot on the community wiki.
Mini-boss encountered in The Underworld (level 80+). Verify attack patterns and loot on the community wiki.
Mini-boss encountered in The Underworld (level 80+). Verify attack patterns and loot on the community wiki.
Mini-boss encountered in Samurai Palace (level 90+). Verify attack patterns and loot on the community wiki.
Mini-boss encountered in Samurai Palace (level 90+). Verify attack patterns and loot on the community wiki.
Mini-boss encountered in The Canals (level 100+). Verify attack patterns and loot on the community wiki.
Mini-boss encountered in The Canals (level 100+). Verify attack patterns and loot on the community wiki.
Mini-boss encountered in Ghastly Harbor (level 110+). Verify attack patterns and loot on the community wiki.
Mini-boss encountered in Ghastly Harbor (level 110+). Verify attack patterns and loot on the community wiki.
Mini-boss encountered in Steampunk Sewers (level 120+). Verify attack patterns and loot on the community wiki.
Mini-boss encountered in Steampunk Sewers (level 120+). Verify attack patterns and loot on the community wiki.
Mini-boss encountered in Orbital Outpost (level 135+). Verify attack patterns and loot on the community wiki.
Mini-boss encountered in Orbital Outpost (level 135+). Verify attack patterns and loot on the community wiki.
Mini-boss encountered in Volcanic Chambers (level 150+). Verify attack patterns and loot on the community wiki.
Mini-boss encountered in Volcanic Chambers (level 150+). Verify attack patterns and loot on the community wiki.
Mini-boss encountered in Aquatic Temple (level 160+). Verify attack patterns and loot on the community wiki.
Mini-boss encountered in Aquatic Temple (level 160+). Verify attack patterns and loot on the community wiki.
Mini-boss encountered in Enchanted Forest (level 170+). Verify attack patterns and loot on the community wiki.
Mini-boss encountered in Enchanted Forest (level 170+). Verify attack patterns and loot on the community wiki.
Mini-boss encountered in Northern Lands (level 180+). Verify attack patterns and loot on the community wiki.
Mini-boss encountered in Northern Lands (level 180+). Verify attack patterns and loot on the community wiki.
Mini-boss encountered in Northern Lands (level 180+). Verify attack patterns and loot on the community wiki.
Level 130+ 8-Player Boss Raids Pool (5)
Endgame Raid RotationRotates in as a Boss Raid encounter (level 130+). Verify attack patterns and loot on the community wiki.
Rotates in as a Boss Raid encounter (level 130+). Verify attack patterns and loot on the community wiki.
Rotates in as a Boss Raid encounter (level 130+). Verify attack patterns and loot on the community wiki.
Rotates in as a Boss Raid encounter (level 130+). Verify attack patterns and loot on the community wiki.
Rotates in as a Boss Raid encounter (level 130+). Verify attack patterns and loot on the community wiki.
The 4-Phase Loop That Solves Every Telegraph
Dungeon Quest Reborn bosses share a readable, learnable pattern. Instead of memorizing fixed attack lists, learn the loop below and apply it to any encounter — then confirm the specifics in-game.
Watch the ground shape, animation, or target marker → stop long casts and move to open space.
Track latency, direction, and repeating pulses → leave latency margin and take a planned route.
When the ground clears or the boss pauses → swing the camera back and deal safe damage.
At the next pattern or phase change → return to a spot with multiple exits.
Solo Kiting & Execution Protocols
- Widen your camera so telegraphs and an exit are both visible.
- Start near open space, not a wall.
- Use short, repeatable attacks until you understand the phases.
- Keep one recovery option for the attack that's been giving you trouble.
4-Player & 8-Player Party Coordination
- Agree on a damage path, support, and positioning before entering.
- Spread so telegraphs don't overlap but buffs/AoE still reach.
- During safe windows, don't drag the boss away from allies.
- If someone falls, only continue if the team can still clear safely — check pull splits, stacked telegraphs, and cooldown mistakes before blaming numbers.
Dungeon Difficulty Tier Ladder
Higher tiers raise enemy attack frequency, telegraph speed, and loot rarity multipliers. Only step up after completing the lower tier with zero deaths.
Learn the route; low enemy scaling.
Steady progression.
Tighter windows, more scaling.
High scaling; demands a tuned build.
Max scaling and rewards; endgame pressure.
Verified Boss Gameplay & Mechanic Breakdowns
Verified with YouTube's oEmbed API. Key tactical takeaways extracted directly from authentic creator captions — zero speculative filler.
Route walkthrough: Desert Temple → Enchanted Forest
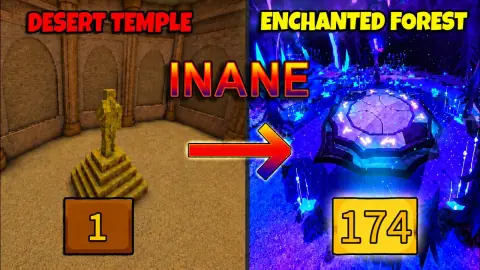
A full-route run that names each boss and the dodge that beats it. Takeaways below are extracted from the video's own captions.
- Desert Temple: only one side of the room is the correct way — glance at the layout before committing, and you can shoot spells through the wall.
- Winter Outpost: the boss cycles three attacks — a spawned minion, straight lines, and green circles. The minion is fast, so keep moving.
- Pirate Island boss is Captain Blackbeard: one big red line that must be dodged, plus red circles.
- Underworld spider boss: it fires six white projectiles — count six, run through, get your damage in, then retreat.
Soloing Aquatic Temple (endgame)
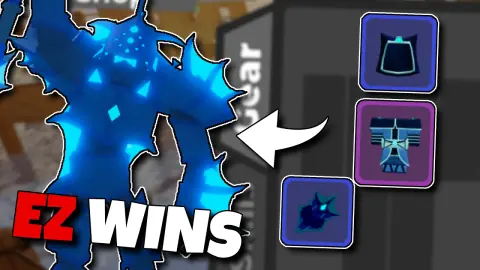
Confirms Aquatic Temple is a live Dungeon Quest Reborn dungeon, not an original-Dungeon-Quest map.
- Aquatic Temple is described as one of the hardest dungeons in Dungeon Quest Reborn — direct evidence that the Reborn route extends past the eight-map progression path.
- The guide runs a glass-cannon build: all points into damage, no stamina points.
- Recommended setup names purple Lava King's armour, a tier-three weapon, and abilities inner focus (or rage for Warrior) plus lava barrage or amethyst blast from Volcanic — confirming Volcanic gear exists in Reborn.
- Opening pull: walk forward without activating your enhanced ability, bait the defensive cube pylon's first attack, then activate and stand inside the spirits.
Odin Reincarnation Bonus Boss & Northern Lands Endgame
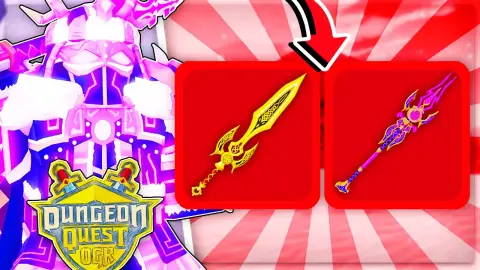
Verified endgame clear and live preview of the Odin Reincarnation bonus boss mechanic. Key takeaways extracted from Rexon's authentic English captions.
- Northern Lands Nightmare Level Gate: Recommended character level is 187–190+ with optimized high-tier gear before attempting solo clears.
- Bonus Boss Activation: Upon defeating Odin at the end of Northern Lands Nightmare, a voting prompt ('Stay and fight the bonus boss') appears; selecting fight activates the bonus encounter.
- Strict Encounter Rules: The Reincarnation boss stage imposes a 5-minute time limit and a hard 3-lives cap — deaths cannot be bypassed with infinite revives.
- Platform Positioning Strategy: Kiting the boss and standing back on the upper elevation platform allows dodging low-trajectory nuclear projectile barrages.
Levels 0–80 Boss Mechanics: Desert Temple through Underworld

Extracted from verified English captions. Tactical walkthrough covering solo telegraph avoidance, positioning safe spots, and attack rotations for early-to-midgame dungeon bosses.
- Desert Temple (Sand Giant): Bait the forward smash by circling horizontally around the boss, then immediately walk straight backward to evade the expanding ground shockwave.
- Winter Outpost (Ice Elemental): The boss is completely stationary; stand safely in the dead angle between spiral ice spikes and apply persistent AoE spells like Poison Cloud while dodging spawned minions.
- Pirate Island (Blackbeard & Spider Queen): Side-step Blackbeard's straight cannon line, then circle bubbles. For Spider Queen, safe-spot by hugging the entrance rock alcove to snipe her with ranged skills while immune to melee swipes.
- King's Castle (Beast Master, Archmage, The King): Against Beast Master, stand still and use subtle micro-steps to dodge ground indicators. Archmage executes a checkerboard 'dance floor' immediately followed by a linear burst — focus purely on footwork without attacking during transitions. Sprint continuously in one direction to outrun The King's leap slams.
Apply Encounters By Specific Dungeon Tier
Each dedicated dungeon route page translates these boss telegraphs into specific room layouts and trash-mob skips.