Abilities & Skills Directory
Active combat abilities and Dungeon Quest Reborn skills placed on your hotbar. Every ability and skill listed here is confirmed through gameplay captures and progression clear videos.
Gameplay Evidence Standard
Abilities (also known as Spells or Skills) form the active combat toolkit assigned to your hotbar. Current gameplay evidence confirms distinct ability categories across damage, team buffs, and survivability. Unlike legacy wikis that publish unverified coefficient formulas from older games, we document confirmed ability names, verified roles, and operational behaviors.
Combat Controls & Hotbar Mapping
Standard keybinds for weapon attacks, active abilities, and movement during dungeon encounters.
Standard attack combo dictated by equipped weapon archetype.
Primary active skill (typically your highest damage burst or AoE).
Secondary active skill (utility, mobility buff, or heavy strike).
Instantly swaps between primary DPS loadout and secondary Healing loadout mid-combat.
Directional positioning and telegraph evasion.
Clear low ground hazards and reposition over obstacles.
Confirmed Gameplay Abilities
Organized by functional combat role: offensive spell damage, physical & magic buffs, and survival recovery.
Spell DPS
Direct offensive spells scaling with Spell Power.
Ice Needles
Ranged piercing projectile; reliable single-target poke.
Poison Cloud
Persistent area-of-effect damage zone for clearing grouped trash.
Lightning Strikes
Instant burst strike; effective during boss vulnerability windows.
Fireball & Blue Fireball
High-impact ranged projectiles with splash radius.
Arcane Spray
Cone-shaped multi-hit spell for close-to-mid range crowd control.
Phantom Flames
High-tier burn ability providing lingering damage over time.
Fire Bomb
High-impact explosive burst for clearing dense enemy swarms.
Buffs & Support
Team-wide or self-enhancement skills that boost damage windows.
Innervate
Grants an 8-second Magic damage multiplier. Core for Mage burst rotations.
Battle Shout
Empowers nearby allies and self with increased Physical weapon damage.
Enhanced Inner Rage (EIR)
Advanced physical buff sought after for endgame raid speedruns.
Enhanced Inner Focus (EIF)
High-tier spell scaling buff referenced in endgame theorycrafting.
Healing & Defense
Vital recovery spells that turn failed runs into reliable clears.
Universal Heal
Instant cast self/party heal; vital for solo Hardcore runs.
Aura of Life
Sustained healing over time to mitigate unavoidable arena-wide damage.
Chain Heal
Rapid bouncing emergency heal targeting low-HP squadmates on a fast 6s cooldown.
Guardian & Crowd Control
Defensive taunts, mobility interrupts, and mitigation skills essential for frontline tanks.
Cleansing Beam
Dispels status ailments, grants team absorption barrier, and provides speed burst.
Blood Pact
Trades minor sustained health drain for heavy flat damage reduction and interrupt immunity.
Vengeful Taunt
Locks boss aggro onto the tank and reflects a portion of incoming burst damage back to attackers.
Gravity Leap
Gap-closing leap that pulls and staggers trash packs while generating a temporary damage shield.
How to Choose Abilities for Your Build
Strict Axis Alignment: Always ensure damage skills match your primary stat (Physical vs Spell Power).
Uptime vs Burst: For general dungeon progression, reliable AoE room clearing trumps high-cooldown single-target nukes.
Safety Margin: When learning new boss encounters or playing Hardcore, equipping one heal or long-range projectile saves runs.
Creator Gameplay: Meta Abilities & Level 100+ Skill Combos
Verified with YouTube's oEmbed API. Key tactical takeaways extracted directly from authentic creator captions — zero speculative filler.
Fastest Progression Route, Daily Reward Scaling & Stance Hotkeys

Comprehensive 1–180 progression breakdown. Tactical takeaways extracted directly from Rexon's verified captions.
- Daily Reward Tier Scaling: Daily login rewards dynamically scale to your character's highest unlocked dungeon tier; claiming daily loot immediately upon unlocking a new dungeon bracket yields gear before beating the dungeon.
- Combat Stance Swap (F Key): Pressing F in combat instantly swaps between your primary DPS ability set and a secondary Healing skill set (e.g., Redemption, Rejuvenating Spray, Aura of Life) without resetting background cooldowns.
- Level 130–140 Boss Raids Corridor: Steampunk Sewers XP progression slows at level 130; farming Tier 1 Boss Raids (which award the same flat XP as higher tier keys) provides the fastest route to level 140 to unlock Orbital Outpost.
- Key Ability Milestones: Fire Bomb (Winter Outpost, premier early mage AoE), Illusion Blast (Samurai Palace Nightmare, first true movement ability), and Pulse Waves / Life Dash (Steampunk Sewers mobility/burst).
Post-Level 100 Meta Skills & Ability Pairings
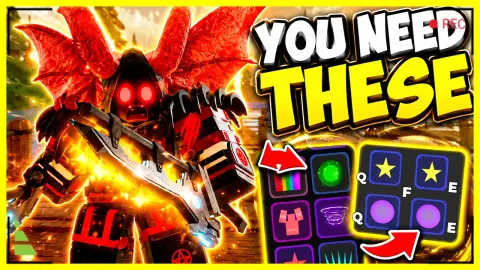
Tested on post-Samurai endgame dungeons. Takeaways below are extracted from the creator's verified English captions.
- Stat Allocation: Recommends roughly 70% primary damage stat and 30% physical/health points for level 100+ solo dungeon viability.
- Life Dash is ranked among the highest-utility mobility abilities: it provides a rapid dash burst, instant party/solo healing, and a sprint speed boost to dodge boss AoE rings.
- Offensive Ability Pairing: Starfall offers massive targeted multi-hit burst damage, clearing entire mob waves and melting mid-bosses from safe distance.
- Rotation Strategy: Open with Inner Focus / Inner Rage buff (+80-90% damage multiplier), cast primary AoE (Starfall), and immediately reserve Life Dash for boss line-attack escapes.
Early-to-Midgame Progression Bible & Stance Swapping
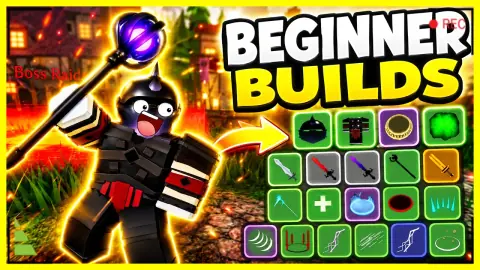
Extracted from verified English captions. Details early dungeon skill progression from Desert Temple through Pirate Island, plus F-key stance swapping.
- Early Spell Milestones: Poison Cloud (Desert Temple) provides top damage-over-time; Lightning Strike offers instant burst; Ice Needles (Level 32) provides rapid low-cooldown cycling.
- The Winter Outpost Solo Wall: Winter Outpost (Level 40-60) is the steepest solo difficulty spike in the game; players should expect to overlevel to 55-60 before reliably clearing it solo.
- Keyboard 'F' Skill Swapping: Reborn enables mid-combat skill set swapping by pressing F, allowing players to instantly toggle from DPS abilities to dedicated healing loadouts.
- Aura of Life Nightmare Tanking: Equipping Aura of Life with full spell power instantly restores 100% of player and teammate HP on a short cooldown, allowing teams to out-heal Nightmare boss attacks without dodging.
Ability & Skill FAQs
How do you cast abilities in Dungeon Quest Reborn?
Active abilities are assigned to keys Q (Slot 1) and F (Slot 2) on PC, and trigger from dedicated touch buttons on mobile.
Can Physical builds use spells in Dungeon Quest Reborn?
Yes, utility spells like Universal Heal or Battle Shout require no Spell Power to provide their survival or buff benefits.
Where do new abilities drop in Dungeon Quest Reborn?
Abilities drop directly from dungeon completion chests alongside weapons and armor, scaling with the dungeon's tier and difficulty level.